Environment Configuration
The environment configuration is the first step to integrate your system with Payphone services. Basically, it is about preparing everything necessary for your system to communicate securely and efficiently with Payphone, as if you were building a bridge between the two.
✅Why is it important to set it up right?
- 🔐Security: Ensure that all the information you exchange with Payphone is encrypted and protected, preventing unauthorized access.
- ⚙️Correct operation: A good configuration ensures that the requests you send to the Payphone APIs work without errors and you receive the expected responses.
- 🎯Customization: Allows you to adapt the integration to the specific needs of your business, such as choosing which payment methods to offer, configuring stores, among others.
📒What will you learn in this guide?
With this step-by-step guide, you will learn how to set up your environment for Payphone integration. Key details are included, such as:
- 🔸Initial system configuration.
- 🔸Obtaining credentials (tokens and API keys).
- 🔸Preparation for test and production transactions.
By following these instructions, you will be able to implement an efficient payment gateway tailored to your customers' needs.
💼Prerequisites.
Before you begin, make sure you have the following:
- 🔸Payphone Business Account: You need an active account to manage your stores, users and sales. 👉 Register here if you don't have one yet.
- 🔸Development environment: You must have a technical environment ready to implement integrations (such as a code editor and testing tools).
- 🔸Basic development knowledge: It is useful to be familiar with concepts such as:
- 🔹HTTP Requests
- 🔹JSON format
- 🔹Authentication with tokens or API keys
🥇STEP ONE: Creating a Developer User
Before starting the integration, you need to create a user with the "Developer" role in your Payphone Business account. This user will be able to access the necessary technical tools and credentials.
How to create the user:
- Log in to Payphone Business with your RUC or CI, email and password, with your user with Administrator role.
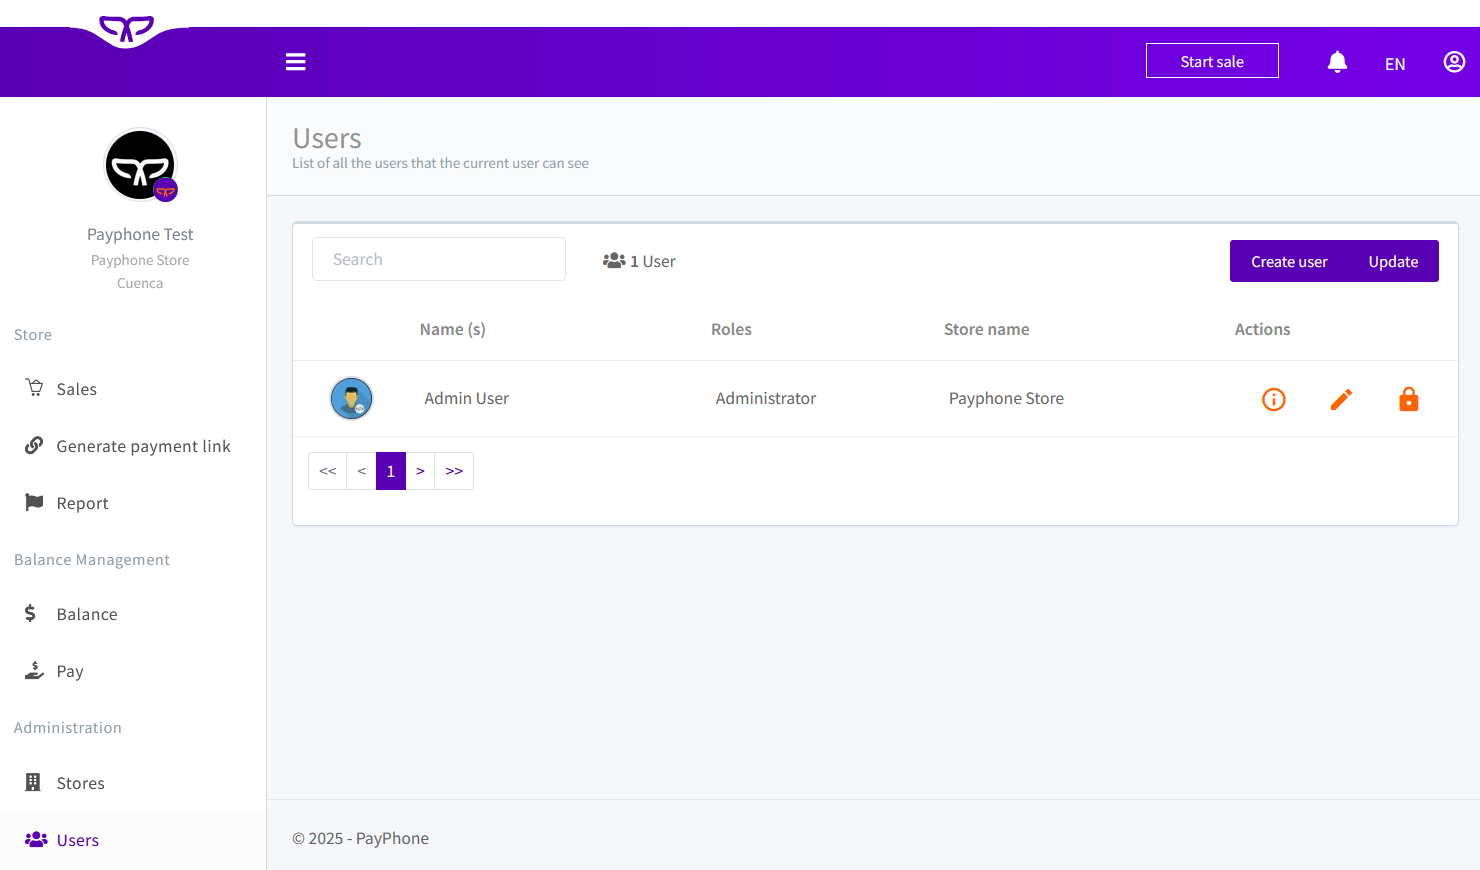
- Go to the "Users" menu and click on "Create User".
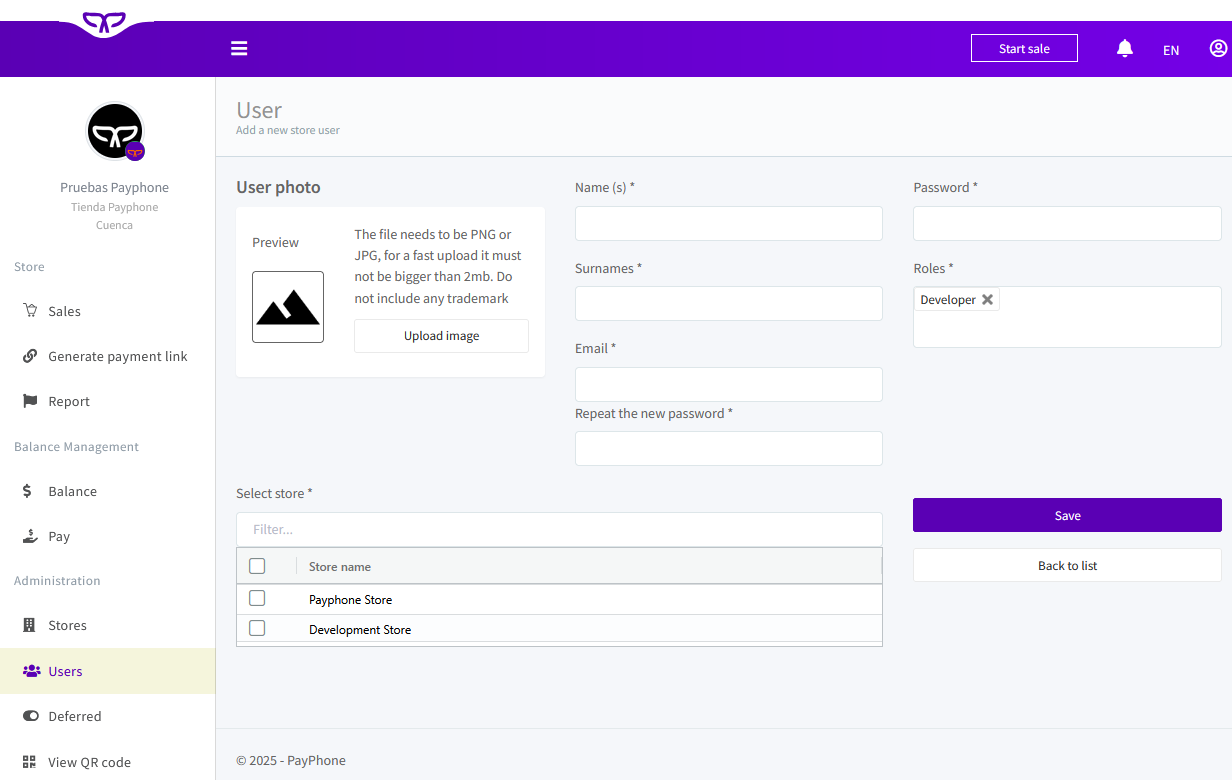
Complete the form by entering all the required data:
- Name, surname and e-mail address of the developer.
- Assign a password.
- Select the "Developer" role.
- Associate at least one active store.
Once created, this user will be able to access the Payphone development platform.
🥈STEP TWO: Configure the Development Environment
This configuration allows your system to communicate securely and effectively with Payphone services. Follow these steps to get started:
1. Access the platform for developers
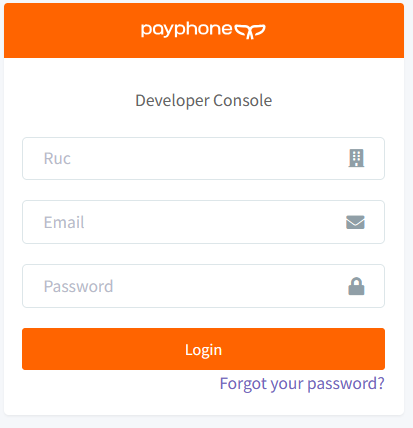
- Log in to Payphone Developer: https://appdeveloper.payphonetodoesposible.com/
- Login with your developer user credentials (RUC or CI, email and password).
2. Create a new application
Payphone's development applications allow you to configure connection parameters, test users and manage your environment(test and production).
In addition, they allow you to obtain the credentials(Token and StoreID) needed to interact with the API.
Steps:
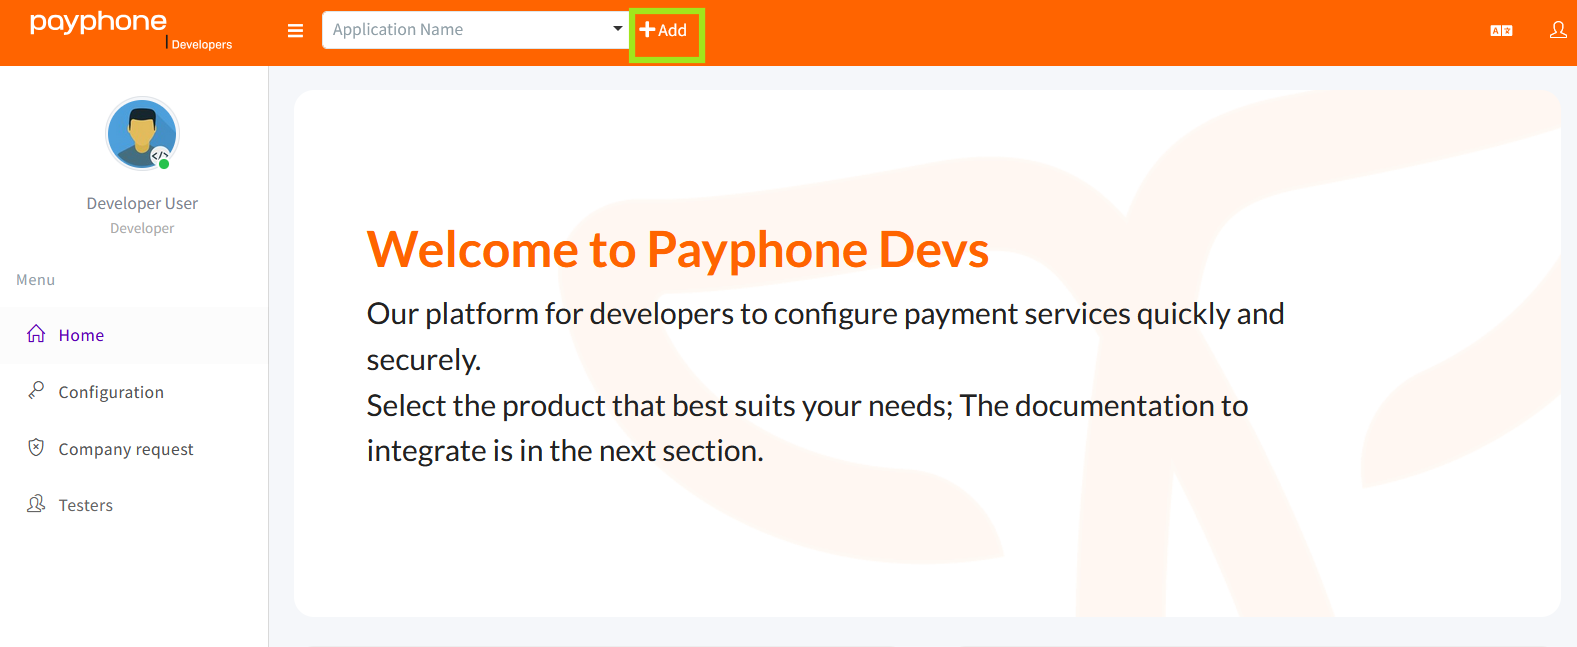
Click on "+ Add" at the top of the screen.
Complete the Form: A form will open in which you must enter your application information.
Below are the fields you must complete:
Name: Define a name that clearly identifies your application.
Description: Add a brief description of the functionality or purpose of your application.
Category: Select the category that best matches your business profile.
Development Platform: Choose the platform where your application is developed. If the exact option does not appear, select the most similar one.
Type of Application:
- WEB: To integrate Payment Button, Payment Box, Wordpress or Prestashop Plugin.
- API: To integrate API Link of payments or API Sale.
When choosing Application type"WEB", you will be required to fill in two new fields.
Web Domain: Enter the URL of your website. It is important that only the registered domain can access our Payphone payment buttons. If you try to open from another domain, access will be blocked.
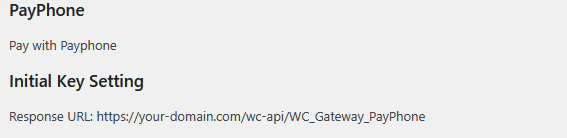
Response URL: Provides the URL to which the user will be redirected once the transaction is completed. This URL will contain the necessary parameters to obtain the complete details of the transaction.
For Wordpress and Prestashop plugins, the response URL can be found in the plugin configuration.
After completing all the fields, press the Save button.
🥉THIRD STEP: Obtain Credentials (Token and StoreID)
Once your application is created, you will get the necessary credentials to interact with our APIs.
- 💳Access the "Credentials" section: Go to the top menu and select the "Credentials" tab.
- 🔐Token and StoreID: In this section you will find your Token and your StoreID. Both are necessary to authenticate your app with Payphone services. You can easily copy them with the buttons provided.
🔐Token:
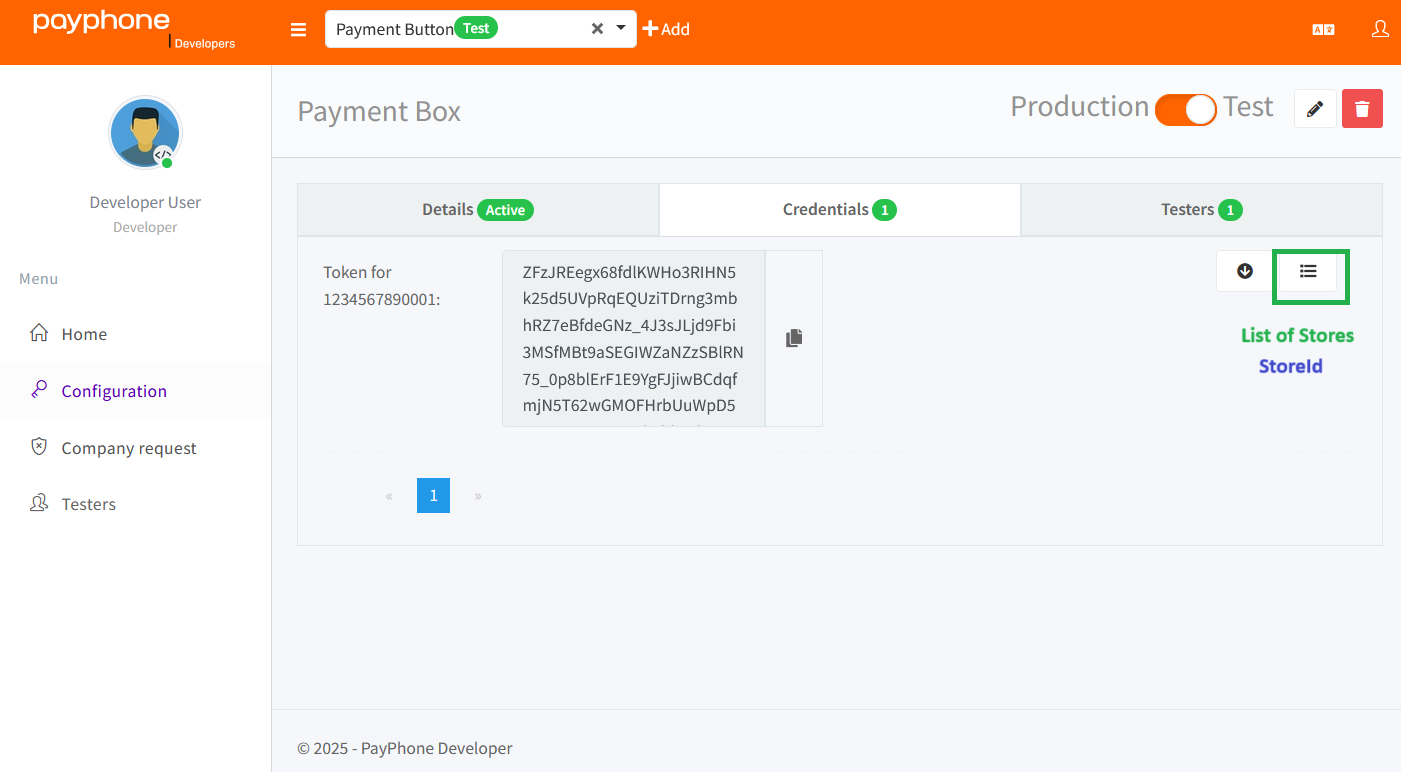
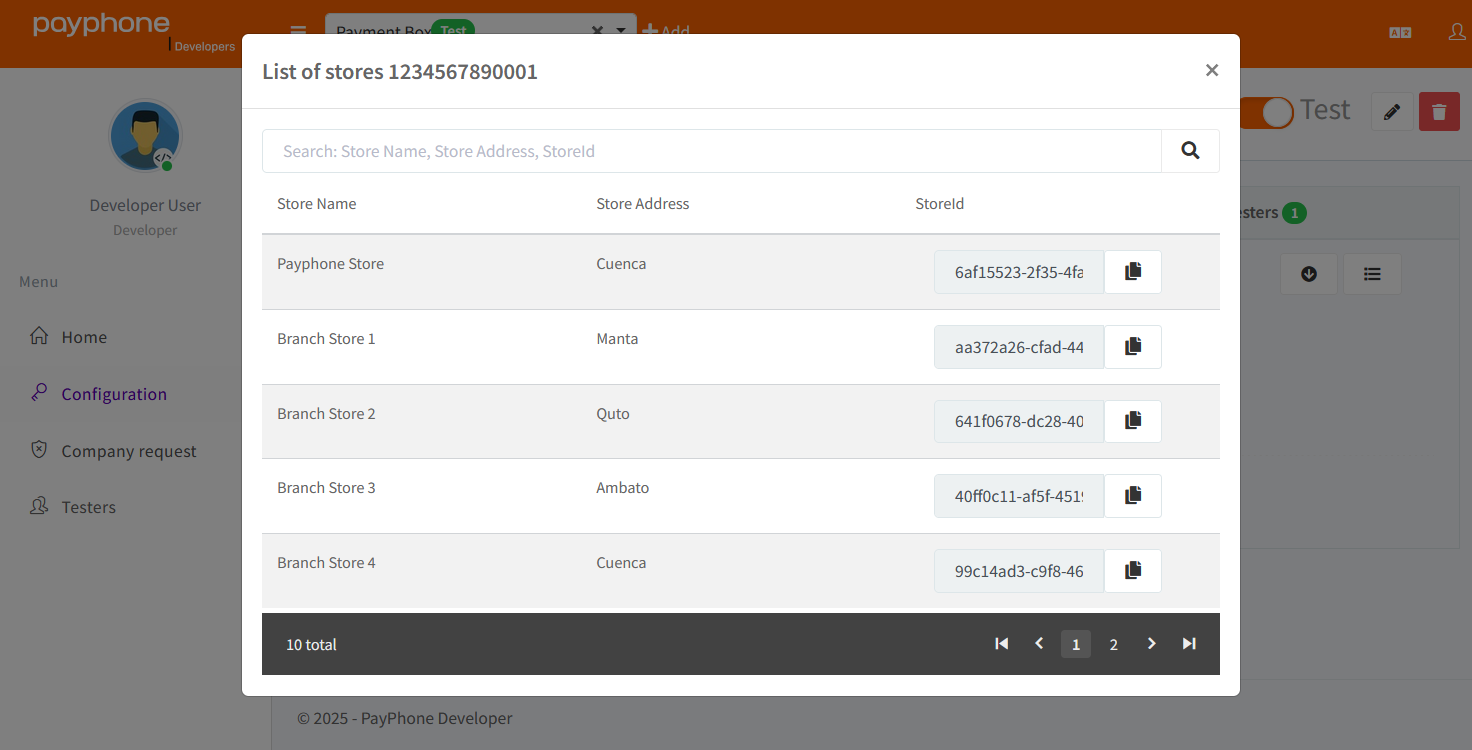
🆔StoreId:
🏁FOURTH STEP: Test Environment and Move to Production
As we mentioned before, at Payphone you have full control over the process. You are the one who decides how to run the tests and when to go to production. You don't need any certification process, and you can publish your application independently. Here is a guide to make this process easier for you.
Available environments:
Payphone offers two preset environments for your integrations:
🧪 TESTS
🖥️ PRODUCTION
By selecting your application's configuration, you will be able to select the environment you wish to use.

🧪TEST environment:
A secure environment to develop and test your application without affecting your users.
In the test environment, all your transactions will be approved, but will not be connected to any bank processor.
This means that you can use your cards (valid Visa or Mastercard) without any real charge or you can use fictitious data that meet the requirements of each field.
You can use tools such as Postman or curl to make requests to our services and verify the responses.
📱Testers:
The tester section is designed for personal Payphone users and allows simulating payments from the Payphone application. Its configuration is optional.
How does it work?
🔸Invite a personal Payphone user: Access the menu "Testers" > "Customers" and register the phone numbers of Payphone users.
🔸Confirmation: You will receive an email invitation to the email address associated with your personal Payphone account.
🔸Test! Once the invitation is accepted, they will be able to simulate payments from the Payphone app and you will be able to see how they are processed.
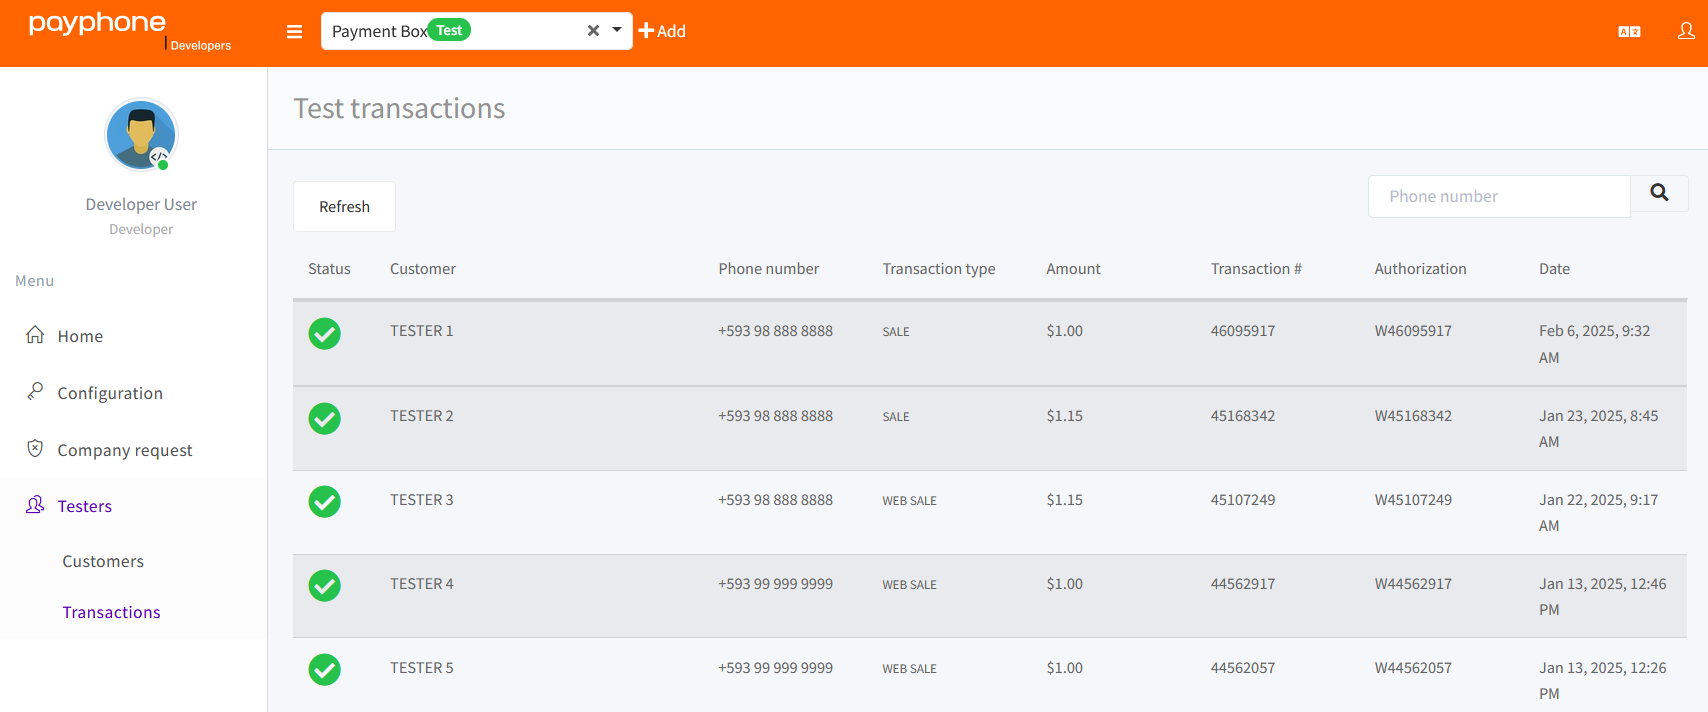
👁️View Transactions in Tests:
If you wish to view any transactions made during testing, you will find a detailed log in Payphone Developer.
Then go to the 'Testers' section and finally click on'Transactions'.
🖥️Production Environment
This is the environment where your customers will actually make their payments. All transactions carried out in this environment will be connected directly to the banking system, which means that the money will be effectively transferred.
📌Recommendations:
🔸Final Testing: Perform extensive testing in the production environment before releasing the application to the public.
🔸Cardholder Data: Use only real data (card numbers, customer data linked to your issuing bank, etc.) to avoid any inconvenience.
🔸Security protocol: Our system has high levels of security, so it is important to use correct data to avoid possible blockages.
Once your application is in production, the process is complete.
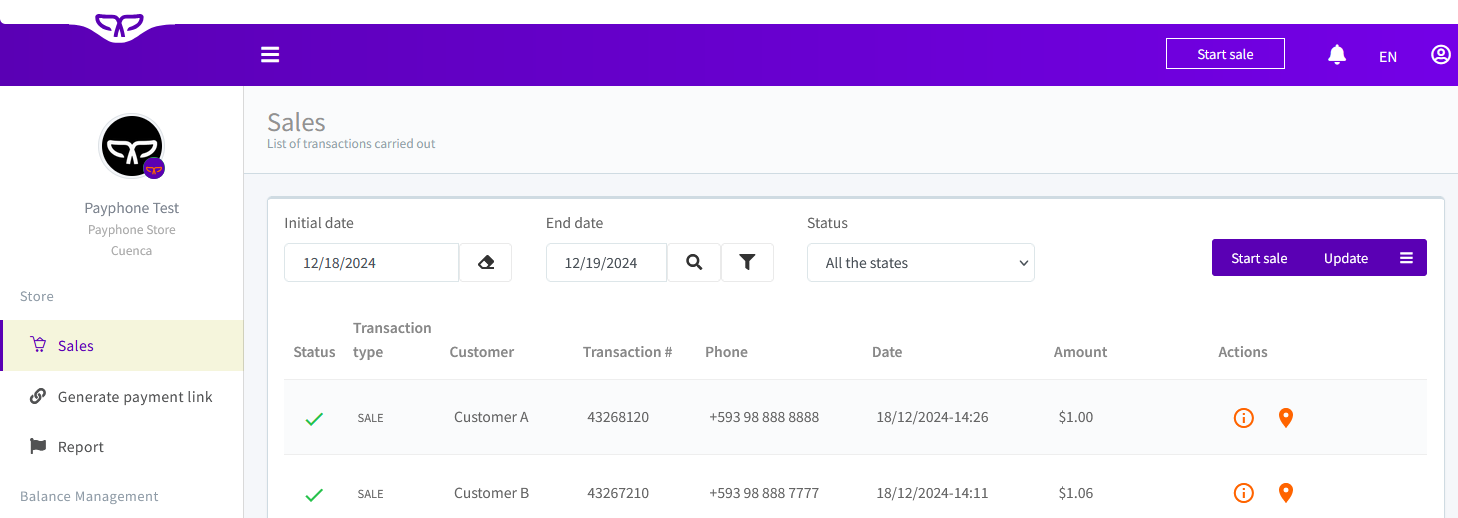
👁️Visualization of Transactions in Production:
To review the complete transaction history in the production environment, go to Payphone business. Then click on the 'Sales' option.